Showing posts with label craft. Show all posts

Monday, 1 June 2015

With This Ring - Upcycled Tutorial Featured in Hazed Magazine


This sweet little ring bearer’s cushion can be made as a keepsake, by using treasured items from the bride and groom. Perhaps a favourite tie the groom was given by his grandfather, or a vintage button from the bride’s button stash handed down from her granny. Or even clothes from the couple’s wardrobe that are no longer worn. All can be repurposed and easily made into a cushion for wedding rings. You can also look for inspiration in local op shops – for colours or patterns that compliment the wedding. If the wedding party is getting outfits made you could ask for any leftover fabric/embellishments and construct a cushion that will coordinate perfectly. You are only limited by the theme of the wedding and your imagination.


If you are a beginner to the world of sewing, then stick to a simple square or circle cushion, with a button stitched on in the centre, and ribbon to attach the rings. You can use the instructions below, without adding the bunting.


Bunting Cushion
Skill level: heading towards intermediate level
Materials:
Sewing machine and matching threads
Sewing scissors
Fabric
Felt scraps
Ric-rac or narrow bias binding
Sewing needle
Sewing pins
Tailors chalk or a light pencil
Iron and ironing board
Circle template (eg a dinner plate or bowl)
Piece of card (eg cereal box or shoe box weight)

What to do:

Place your template on your fabric and draw 2 circles. Cut them out.


Now draw a triangle template on your card the size you want the bunting flags.

Place the template on the felt scraps, draw around and cut out, until you have enough flags.


Arrange the flags on the top circle into a curve. Make sure the bunting starts and finishes at least 1.5cm away from the edge of the circle, so you do not catch it when you sew the circles together.


Carefully pin the flags down and slowly sew along the top edge, stopping after each one to make sure the next one is in place.


Now sew your bias binding or ric rac over the top of the stitching line (don’t use ribbon as it doesn’t curve well).


Before attaching the top and bottom circles together, you can pin the buntings up and away from the stitching line if you are worried about catching them when you sew the seam.


Place the top and bottom circles together with the right sides facing each other. Sew with a straight stitch around the circle, 1cm from the edge. Remember to leave a 5 – 7cm opening to allow for stuffing.


Carefully clip around the circle every 1cm or so, to ensure you get a nicely curved circle.

Now stitch around the circle again, just inside the first straight stitch you did. This is to reinforce the seam so it doesn’t pull away at the clipped points. You can now trim the seam allowance from 1cm down to 5mm. If you want you can neaten the circle edges together with a zig zag stitch.

Image

Time to turn the cushion by pulling it through the stuffing hole. Once it’s out the right way give it a gentle press with the iron. If the circle is slightly straight in places you can turn it inside out and re-clip it, till the seam has an even curve.


Now stuff the cushion. I used wool filling from an old cot mattress (I washed it first), but you can also use Dacron (the filling used in pillows). Once you have the fullness you want, close up the opening. Fold the seam allowance under, and use a small hand stitch with needle and thread. Now work the stuffing around to fill out the cushion evenly.


Lastly you can stitch on a ribbon, twine or embroidery thread to attach the rings. Make sure this is securely fastened to the cushion with needle and thread, as you do not want the rings to come off.


Now the page boy is all set with a beautifully upcycled cushion, that compliments the wedding and can become a treasured keepsake of a special day. Here are some more examples that have been made from a mix of vintage linen and fabrics, doilies, upcycled clothing, and new fabric

Monday, 17 November 2014

O for awesome in Oamaru

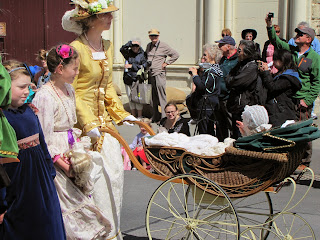
Having started feeling reasonably ambivilant to going down to Oamaru Heritage Week for the long weekend, I finished our getaway with fresh inspiration and a head somewhat distracted by design possibilities. Work/home/life in general has had more than its fair share of stress lately, so going away seemed like just another thing to get through. However leaving Christchurch gave me the opportunity to leave my worries behind as well. And just enjoy myself - have some much needed family time and fun. Andy was in the demonstration team for Bike Polo (which came about in the late Victorian era by the way) - who would have thought?!?!? Except back then they played on rather unforgiving bikes on grass. Its a bit more technical these days. Anyhow, I have taken some pics of my experience of some of the Victorian themed Heritage week. Interspursed are some rather exciting Steampunk costumes - Oamaru being the Steampunk Capital of NZ - that celebration happens in June each year, so that will definetly be on the cards for a visit!

Sunday, 1 June 2014

14 creative projects for 2014

In an attempt to find more motivation, i have come up with 14 projects that i would love to complete this year. A rather lofty goal, especially as month five is already underway. However, I am getting rather frustrated with my lack of creative output. Admittedly I do have family, work, EQC repairs and life in general going on - but in a recent personality test i completed, it was rather apparent that i thrive when creativity is a big part of my life. Another big theme that emerged was living in the moment - something i am definitely needing to be mindful of - and practice - (which sounds crazy, but is easily forgotten in a fast paced world.) However back to the matter at hand - creativity. I have been journalling about family/work/life balance lately...and mulling over my time management. Where do I invest my energy? Most of it goes to my family - which is pretty reasonable at this stage of life. The rest of my emotional output mostly gets sucked up by my youth work job. Which is ok most of the time, and really hard some of the time. When the ‘some of the time’ hits I have to manage myself more carefully - get more sleep, say no to extra stuff, and somehow find time to recharge. A delicate balance - one that i am still working out how to achieve. And somewhere in all of this lies my creativity. It also became apparent in journalling that creativity is woven into my day to day life - baking, cooking dinner, family walks on the beach, doing crafts with my daughter, playing lego with my son, choosing colour schemes for the house, photography, and coming up with creative ways to teach young people about emotional coping skills, and negotiating the sometimes rocky journey of adolescence. It was also apparent that most of this creativity involves giving to others. Which is a pleasure most of the time - and really hard some of the time. And that is another reason I came up with my list. Having some more tangible goals to work towards that are mainly focussed on doing something creative just for me feels slightly selfish. Which probably comes from being a mum for the past 9 years and getting so used to giving out more than I get back. But I need to keep reminding myself that it’s actually self-care. A phrase that can be quite foreign in the world of parenting young children, and in our somewhat hectic schedules of life and work in general. Furthermore, if creating just for pleasure, and just for me, helps boost my emotional reserves - it will actually result in more capacity to creatively give to those around me. So will 2014 be the year of 14 creative endeavours? That remains to be seen. One thing 2014 is already becoming is a year of being more mindful of where my creative energy is being focussed, and what i am doing (or not doing) to boost my emotional reserves.

Hazed Magazine

have you checked out the treasure hunt that has just started over at Hazel loves design? Its pretty awesome - up to $1500 worth of handmade loveliness, including one of my custom designed ring bearer cushions, for your big day (or someone you know who is getting married)
My up cycled ring bearers cushion featuring beautiful rings
by Julia @ Relique

a photoshoot at my mum's gorgeous villa
So, if you want to take part, follow this link to Hazel Loves Design, and get hunting!

http://www.hazellovesdesign.com/2014/05/were-going-on-treasure-hunt.html

:) J

ps - my tutorial will be featured on the blog too, if you are interested in making one of these lovely cushions!


Sunday, 24 November 2013

excuse me mister....

i have a bit of a thing for ties...I had over 200 up until 2yrs ago, when i had to make some room for fashion school study to happen in my sewing room...But i did manage to make quite a few bags...Here are some of them
my blue toned 'all tied up' bag
upcycled tie headband
some of my tie bags ready to sell

this one was entered in the Trade Aid upcycled competition
And now, after a bit of a break, I have started looking at ties again - not that i will ever get back to the 200 mark!!!! Only 5 at present! This gorgeously cheesy one I collected for a christmas decoration, for the frock stars christmas challenge...
ooohhh, how christmasy!!!!
And I ended up making a hanging ornament of a christmas tree - with a paisley purple and green tie...Just made 7 so yo-yo's and stitched them together in order from smallest to largest and there you have it - a cute wee tree! I added some ribbon and beads from my stash, and stitched a vintage clip on earring to the top for the star...So many possibilities with this project...
my sideways pic of my christmas tree decoration...


Monday, 2 September 2013

dream journal DIY

My first workshop with Youth Town went well today.   I am doing a mixed media journal workshop - so I thought i better do a practice run beforehand, and then thought I might share the fun!
You will need:

  • A hardcover journal (I got mine from the $2 discount shop)
  • Gel Medium (like Modge Podge, or Reeves Gel Medium)
  • Paint brushes
  • Fabric (non stretch and not pile fabric like velvet - fine cotton is best)
  • Embellishments (lace, ribbon, brads, buttons, charms...)
  • Ribbon (if you want a bookmark)
  • Needle and embriodery thread (if you are using more than one fabric)
  • Stamp + pad (if you want to add stamps)

Firstly, work out what fabric you are using and measure enough to cover the journal, with an inch spare all around to fold over.  Add any lace or embellishments before sticking the fabric to the journal.  Decorative split pins, ric rac, ribbon, and buttons are all great to use.  (Best not to stamp onto the fabric until after the first coat of gel medium is applied.
Got my supplies all ready - dug into my fabric stash and
found these lovely vintage cottons...
Stitching up the fabric with embriodery thread
fabric is now ready to stick to the cover
Once you are happy with how your fabric looks, paint a generous amount of gel medium onto the journal (paint the back first, stick down the fabric, then do the spine, then repeat on the front cover).  Make sure you place some wax paper between the covers and pages to stop the medium sticking to the journal pages.  Now place your fabric onto the journal and smooth it out, getting rid of any air bubbles.  Make sure it is straight and even.
Applying gel medium to the fabric cover
Now apply a layer of gel medium over the top of the fabric cover.  If you have any lace, ric rac or other raised embellishments, make sure you put a generous amount of gel medium over these to help them stick down and create a seal.  Sit the book up on top of a plastic bag and let dry.
folding the flaps over and sticking them down with gel medium
 Once the cover is touch dry, you can trim the corners off the fabric and fold the flaps over to the inside of the journal.  Stick the flaps down with some gel medium, then paint more over the top to secure them.
drying the finished journal on some wax paper,
(the red ribbon i attached at the top for a bookmark)
 Stand the journal up to dry completely - this will probably take overnight, and will  become clear and shiny.  If you want to do any stamping, this can be applied when the first coat is touch dry.  To seal stamps, add another coat of gel medium.
This is Gracies finished journal cover, showing a stamp she
chose.  The second coat of gel medium is drying

Gracie chose to add silver stickers to the corners of her jounal, and used heart shaped brads under the ric rac.  The inside covers of the journal look a bit rough - so you can cut some coloured craft card to compliment your journal cover and stick it to the inside covers to cover up any raw edges.  And that's it.  easy ay! Time to start journalling your hopes and dreams...

ps - here are some of the journals from my workshop: