Monday 2 December 2013

Kia Ora, Bula Vanaka, Talofa! Cafe 53 is opening this week

I am rather excited.  I work 20 hrs a wk for a youth trust in Aranui.  After 6yrs, they have finally got their community cafe off the ground.  This week it is open.  I thought it might be nice to add a splash of colour to the brand new leather couches..Cushions. From a mix of new fabric and some upcycled mens shirts...
lots of colour with an aotearoa/pasifika feel
man's shirt to cushion - and no need for a zip! yipeee!!!
The green cushion has a white shirt backing complete with pocket!
So there you have it - so easy and quick - and no need to insert a fiddley zip - just use the buttons on the front as the opening.  So why not freshen up your decor with a burst of summery fun - find some XL sized shirts and get sewing! :) 

Sunday 24 November 2013

excuse me mister....

i have a bit of a thing for ties...I had over 200 up until 2yrs ago, when i had to make some room for fashion school study to happen in my sewing room...But i did manage to make quite a few bags...Here are some of them
my blue toned 'all tied up' bag
upcycled tie headband
some of my tie bags ready to sell

this one was entered in the Trade Aid upcycled competition
And now, after a bit of a break, I have started looking at ties again - not that i will ever get back to the 200 mark!!!! Only 5 at present! This gorgeously cheesy one I collected for a christmas decoration, for the frock stars christmas challenge...
ooohhh, how christmasy!!!!
And I ended up making a hanging ornament of a christmas tree - with a paisley purple and green tie...Just made 7 so yo-yo's and stitched them together in order from smallest to largest and there you have it - a cute wee tree! I added some ribbon and beads from my stash, and stitched a vintage clip on earring to the top for the star...So many possibilities with this project...
my sideways pic of my christmas tree decoration...


Sunday 10 November 2013

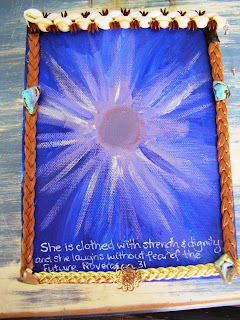
canvas creations

the kids and i dragged out the paints, dusted them off, and created up a storm.   Here is what we came up with:
this is my work in progress - mixed media with doilies
Tarn did this one, and decided he wanted to add a message
Gracie's flower with detail from my jewellery stash
Fun! my challenge was to not try and step in too much and just let the kids be creative how they wanted to...

Friday 8 November 2013

10 years young!

and i'm not sure how we stayed sane packing in all that we have....but I wouldn't swap it for the world! So blessed to have 2 adorable tamariki and a wonderful husband to share life's ups and downs...
So we are off to the movies and out to dinner for Mexican to celebrate, whilst the kiddies are having a sleepover at Grannie and Grandads...
Never did like wearing white, so i went with bronze...
cows behaving themselves for this shot
And here are some of the pics from our gloriously happy day at Mt Hutt Retreat, just 10 short years ago...
ummm....what can i say?!?!?
Rakaia river bed with clouds gathering in the distance
some of our friends and whanau sending happy thoughts our way

A beautiful spot looking up to mt hutt for our ceremony
2 little forest faeries friends..
the start of our journey as Mrs and Mr!
 Awesome to look back 10yrs...Had so much fun creating my wedding dress and the forest faerie outfits.  A perfect, fun filled day - and now 10 crazy, adventurous, challenging, fufilling years on with 2 beautiful, amazing kids along for the ride....
a random pic of fireworks at the pier this week...

Monday 2 September 2013

dream journal DIY

My first workshop with Youth Town went well today.   I am doing a mixed media journal workshop - so I thought i better do a practice run beforehand, and then thought I might share the fun!
You will need:

  • A hardcover journal (I got mine from the $2 discount shop)
  • Gel Medium (like Modge Podge, or Reeves Gel Medium)
  • Paint brushes
  • Fabric (non stretch and not pile fabric like velvet - fine cotton is best)
  • Embellishments (lace, ribbon, brads, buttons, charms...)
  • Ribbon (if you want a bookmark)
  • Needle and embriodery thread (if you are using more than one fabric)
  • Stamp + pad (if you want to add stamps)

Firstly, work out what fabric you are using and measure enough to cover the journal, with an inch spare all around to fold over.  Add any lace or embellishments before sticking the fabric to the journal.  Decorative split pins, ric rac, ribbon, and buttons are all great to use.  (Best not to stamp onto the fabric until after the first coat of gel medium is applied.
Got my supplies all ready - dug into my fabric stash and
found these lovely vintage cottons...
Stitching up the fabric with embriodery thread
fabric is now ready to stick to the cover
Once you are happy with how your fabric looks, paint a generous amount of gel medium onto the journal (paint the back first, stick down the fabric, then do the spine, then repeat on the front cover).  Make sure you place some wax paper between the covers and pages to stop the medium sticking to the journal pages.  Now place your fabric onto the journal and smooth it out, getting rid of any air bubbles.  Make sure it is straight and even.
Applying gel medium to the fabric cover
Now apply a layer of gel medium over the top of the fabric cover.  If you have any lace, ric rac or other raised embellishments, make sure you put a generous amount of gel medium over these to help them stick down and create a seal.  Sit the book up on top of a plastic bag and let dry.
folding the flaps over and sticking them down with gel medium
 Once the cover is touch dry, you can trim the corners off the fabric and fold the flaps over to the inside of the journal.  Stick the flaps down with some gel medium, then paint more over the top to secure them.
drying the finished journal on some wax paper,
(the red ribbon i attached at the top for a bookmark)
 Stand the journal up to dry completely - this will probably take overnight, and will  become clear and shiny.  If you want to do any stamping, this can be applied when the first coat is touch dry.  To seal stamps, add another coat of gel medium.
This is Gracies finished journal cover, showing a stamp she
chose.  The second coat of gel medium is drying

Gracie chose to add silver stickers to the corners of her jounal, and used heart shaped brads under the ric rac.  The inside covers of the journal look a bit rough - so you can cut some coloured craft card to compliment your journal cover and stick it to the inside covers to cover up any raw edges.  And that's it.  easy ay! Time to start journalling your hopes and dreams...

ps - here are some of the journals from my workshop:

father's day fun

lots of creativity happening at present - and fathers day was a great excuse - the kiddies and i made a list of daddies fav foods - one being carrot cake - then we came up with the idea of putting a bonfire on top of the cake with some marshmallows toasting around it...As it is one of our favourite family things to do, especially on the beach up at Kaikoura...We actually lit the candle and toasted the mini marshmallows! Yummy!
the flames are dried apricots and the wood is a flake bar
Tarn added some minifigures to represent us
opshopped books ready for daddy!
Daddy has been getting more into novels lately, so i came up with the idea of getting a pile of opshopped 50cent bargain action/political thrillers (Clive Custler, John Grisham etc) and gift wrapping them...
So after breakfast in bed, we took off to Taylors Mistake beach with a picnic of daddys fav foods, and had a fantastic time exploring, walking, playing on the playground, and paddling (although crazy wee gracie stripped off and had a chilly swim!)  Great, not so consumeristic way to celebrate Father's Day...

Sunday 11 August 2013

the final frock stars refashion

Day 4 and 5 sorted of blurred into each other, and culminated in a late night of slightly wobbly hand stitching and blurry eyes
back view
bow detail at the bodice
front view
i decided to make a head piece with the belt

It's not entirely how I wanted it - I think I could have done a bit better, but I'm happy with it considering my short time frame due to my rather busy existence of late!
My lovely husband got it overnight couriered for me down to Fairle...and i am looking forward to seeing all the before and after images of shock frocks to frock stars! Yay!

Friday 9 August 2013

from pillowslip to frock

I made a rash decision recently and put my name forward to contribute to a very funky craft magazine - Hazed - created by the wonderful Hazel...After some past knock backs, i have to say i was a bit nervous about it all.  However there was no need......(Hazel is so lovely, and really encouraging!)

So ensued lots of fun finding a cute retro pillowslip from the local purple door opshop...and then a photoshoot - for one of my favourite redflax creations - my fern frocks...Basically a pillowslip dress for little girls.  I have had so much fun creating lots of these - op-shopping for retro and vintage pillowslips matching up buttons from my eclectic and now rather vast button collection, experimenting with dyeing embriodered pillowslips, adding frills on the hem from frilled pillowslips.....you get the idea...Now feels like a great time to share my frock fun with everyone!
Here are some sneak peaks from my photoshoot (coz i can't show all of it just yet!), with my gorgeous friend Dawn.  She has a fabulous eye for design, and happens to have a beautiful restored villa just up the road (which is great, as my little beachy batch is being earthquake repaired, and in rather a state at present!).
sharing a funny moment with my photographer!
Don't you just LOVE the retro iron!
Went perfectly with my retro pillowslip..
 So that is just a wee look at what I got up to - for the full tutorial, keep a look out for the Spring Edition of Hazed e-zine - EXCITING...
And here are some past redflax fern frocks I have had lots of fun creating:
My little G is in this collage - she was only 3 back then!
Loved the colours in this - and the covered buttons
this was the first one I sold - on felt.co.nz
 my cousins girl got this - she still wears  it 4 yrs later!
the orange fabric was an op
shopped waffle weave dressing gown 


Sunday 28 July 2013

Hamner holiday

It was about time we had a bit of a break from New Brighton - as much as we love it here, the roadworks are edging ever closer to our house....so off we went.  Andy's lovely work gave him a holiday bonus, so we were even able to take the kids skiing.....Lots of fun!
the view from our road as we were leaving New Brighton
the view of the cute wee batch when we arrived in Hamner
family fun round the brazier toasting marshmallows
sparkler fun!
time to celebrate birthdays with a cake the kids decorated
my wee man is growing up!
gracie wanted to take the bunnies home!
isn't he adorable!
some of Paul's handiwork with a gas cutter on the brazier

Jack's Pass looking beautiful
T and G found a snow cave to play in...
It was just what we needed - so blessed to have such generous and loving whanau to holiday with!