Skill level: Beginner
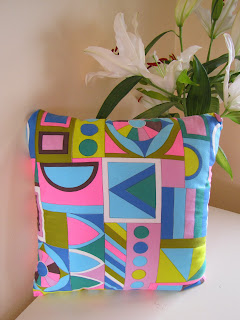
The warmer months are upon us, and what better time than to freshen up your décor? Instead of opting for mass produced goods, why not try something a little different – and kinder to the planet? Start by clearing out your wardrobe, or take a trip to your local op-shop, and find some inspiration in the many interesting garments that are waiting to be transformed.
For this DIY cushion I have used a retro 60’s dress and a large shirt. As long as one garment has buttons (to make your cushion cover removable), and the fabric is suitable for cushions (ie not fine silk), you are only limited by your imagination. I usually take the cushion inner with me when I shop, to make sure the shirt and the other garment have enough fabric to cover the cushion.
So what you will need to complete this project is:
Your chosen garments (one being a large shirt with buttons)*
A sewing machine (or needle and thread if you are very patient!)
Sewing pins
Sewing scissors
Taylors Chalk or a light pencil
An iron and ironing board (or towel to iron on)
A tape measure Paper or light card for a template
*The best material is generally cotton or poly/cotton and medium to heavy weight. Hold the garment up to the light - if you can see your hand through the fabric it won’t be durable enough for cushions. Remember to make sure your shirt is a large size or bigger, as the smaller sizes don’t have enough fabric for a cushion.
Instructions:
1 Measure your cushion inner from seam to seam. Add 1cm onto each seam for seam allowance.
2 Draw a template of your cushion, remembering to add 1 cm all the way around the template for seam allowances.
3 Now place your template onto your shirt and trace around it. Make sure you have the garment straight and the template on straight. When placing the template onto the shirt, make sure the button and button stand are straight and running down the middle of the template. It can help to mark the half-way point on your template, and line it up with the buttons. Also make sure you do not have your template edges going over the top of a button. The cushion seams need to be in between the buttons. This will be your back piece.
4 Take your cut out back piece, and place it down with right sides together, on top of your other garment. Pin it to the other garment, making sure the fabric is straight. Now cut around the back piece.
5 Keeping the pins in place, sew the back piece and the front piece together, remembering your seam allowance is 1 cm. When you get to the corners, try to sew a curve, so you do not have very pointy corners sticking out when the cushion is stuffed. You can now either overlock or zig-zag the raw edges of the cushion to stop the fabric fraying.
6 Now carefully undo the buttons on your back piece and turn the fabric in the right way. Press all your seams with the iron.
7 Carefully insert your cushion inner into your cushion cover. Spend some time moving the inner around so it has filled the corners and isn’t lumpy.
8 After admiring your creation, find a sunny spot with a comfy chair, insert your gorgeous upcycled pillow and yourself with something chilled to drink...sit back and soak up summer
Showing posts with label decor. Show all posts
Showing posts with label decor. Show all posts
Wednesday, 6 May 2015
Sunday, 28 December 2014
Mindful Craft
A light bulb moment recently got me mulling over the concept of mindful crafting. So as I reviewed my list of 14 Craft Projects for 2014, it struck me that perhaps this was not quite the best way to go about it. Because I have discovered the art of mindfulness. Being present. Not past wallowing or future worrying, but present existing. Sounded easy enough, but putting it into practice has been akin to breaking a lifelong habit. However, very slowly it is permeating my world. Enjoy the moment. It sounds so glib. Like one of those shallow quotes floating around the twittisphere, or taking up space on Facebook. So much of my creative time has been about the finish line - out of necessity when I ran my own business and studied fashion design. So how to get back to enjoying creativity for what it is.
Way back when I was a child, something attracted me to creating and craft. Was it the steady, soothing sound of mum’s Elna sewing our clothes, or the Agee jar filled with 3 generations of buttons to sort and play with on rainy days? Maybe it was the smell of the local fabric shop, and the tactile pleasures of its velvet, silks and satins? Or the visual symphony of prints, patterns and colours splashed over fabrics? It’s about getting back to the simple pleasures of creating. And reconnecting with living in the present moment of creativity.
So maybe quantity is not so important as quality. My creative time has gone from a run to more of an amble. The finish line can wait. I am going to enjoy the scenery along the way. And stop to smell the roses – or in my case sort the buttons in the Agee jar!*
*this column is featured in the latest issue of Hazed Magazine - here is the facebook page to find out where Hazed is stocked... https://www.facebook.com/thehazedcollective?fref=ts
The above pics are part of my "Cushy Little Number" tutorial which i had so much fun putting together (with my very talented Stylist and friend Dawn Gatenby)
Monday, 10 March 2014
thinking outside the wardrobe door
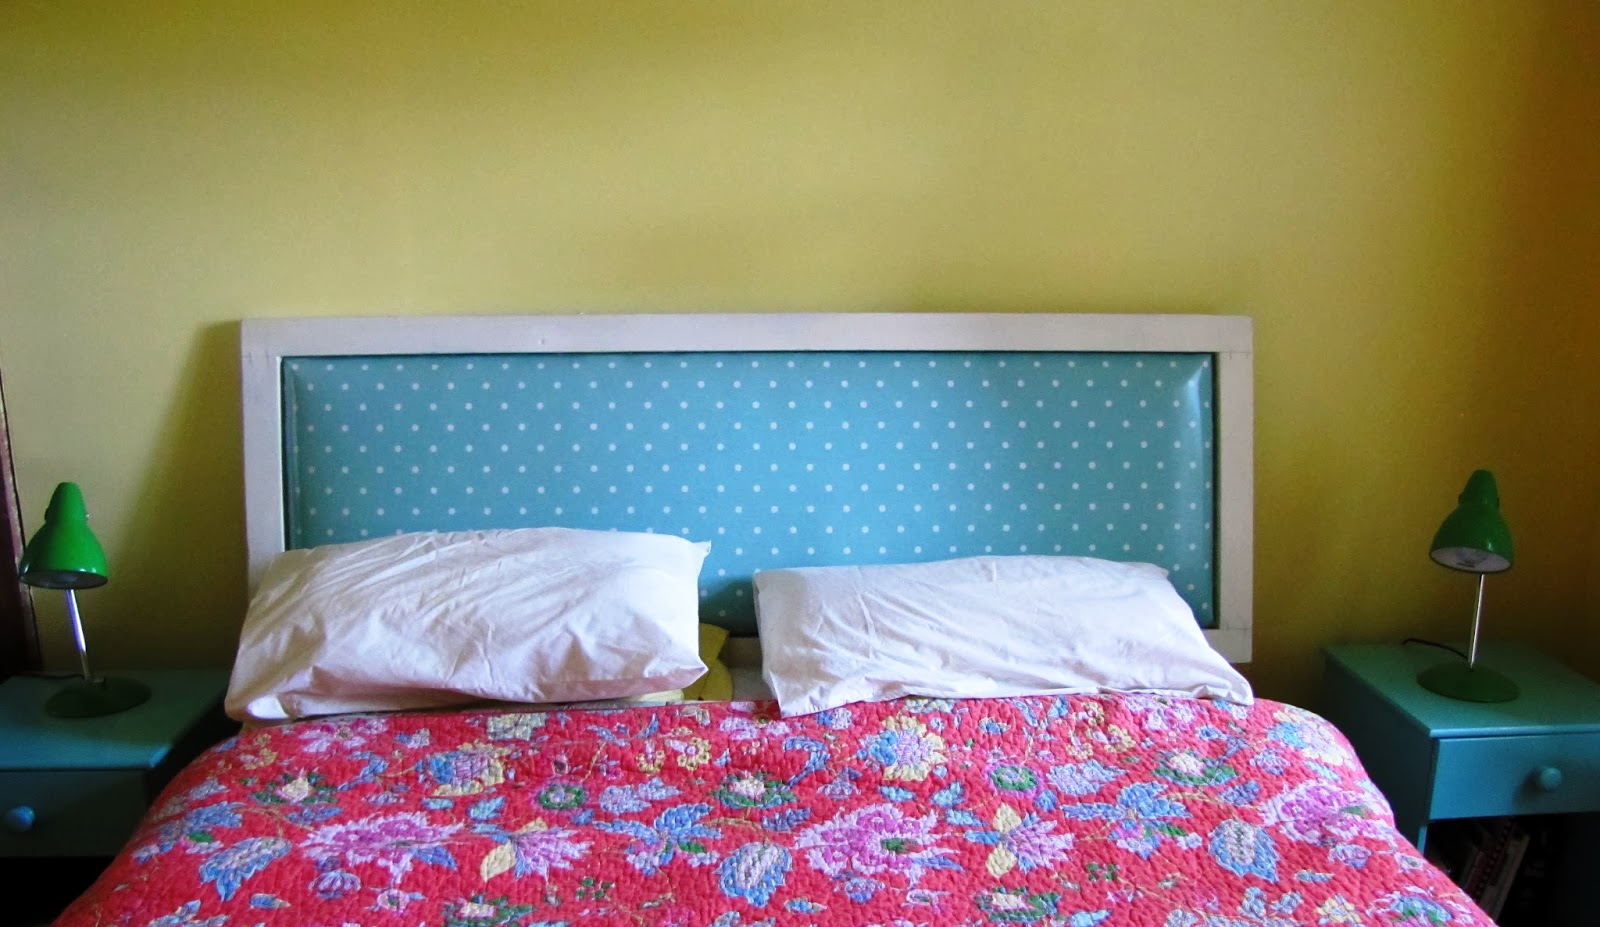
Renovating is underway alongside our earthquake repairs, and finally after 10 yrs our bedroom is being redecorated. My ugly old wardrobe is now lying on our back lawn. Hubby asked about a headboard, which got me thinking along the upcycling lines. And that's where the wardrobe doors came into it. Perfect size for a headboard - old rimu with lots of character. Now to find some fabric - not just ordinary fabric - it had to deal with oily hubby hair and be washable. Which led to oil cloth, and Femme de Broncante - OH what a LOVELY place. Full of french provincial mixed with splashs of shabby chic...so inspiring!!!!
So i ended up with the seafoam polkadot oilcloth, and a pot of Annie Sloan old white chalk paint. ( which i will use to paint the dressers i got from trademe too)
Firstly to sand down the wardrobe door, pull the nails out and take the backing off. Next I cut up an old foam bed topper to fit in the frame so the oilcloth is nicely padded. This gets glued to the backing board.While that is drying, time to paint the frame. I started with Dulux D'Urville Island (my fav aqua paint) as the base, then applied old white chalk paint over the top and rubbed it back slightly for effect. I then applied the Annie Sloan clear wax over the top to finish.
Now for the tricky bit - attaching the oil cloth to the frame with enough give in it to sit nicely over the padding, between the frame and the backing board. I used a staple gun for this step.
Now to put it all together - I popped the painted 'frame' over the covered foam and squashed it down onto the backing board. I used small nails and hammered them through from the back to secure the backing board to the frame. All done!
All that is left is to find some other bit of wardrobe framing to make legs to attach the headboard to the bed. (I also made some yummy linen curtains with fabric from Femme De Brocante - you can find their delicious shop here: http://www.fdb.co.nz/) Will post a pic once the room is all finished...EXCITING!!!!
So i ended up with the seafoam polkadot oilcloth, and a pot of Annie Sloan old white chalk paint. ( which i will use to paint the dressers i got from trademe too)
 |
| The ugly old headboard lying next to my rimu wardrobe door |
Now for the tricky bit - attaching the oil cloth to the frame with enough give in it to sit nicely over the padding, between the frame and the backing board. I used a staple gun for this step.
Now to put it all together - I popped the painted 'frame' over the covered foam and squashed it down onto the backing board. I used small nails and hammered them through from the back to secure the backing board to the frame. All done!
 |
| My upcycled wardrobe door headboard. Walls are in Resene Moonbeam |
Labels:
50's,
Annie Sloan,
bed head,
bedroom,
chalk paint,
chic,
decor,
DIY,
fabric,
headboard,
linen,
oilcloth,
painting,
sewing,
upcycled,
vintage
Monday, 2 December 2013
Kia Ora, Bula Vanaka, Talofa! Cafe 53 is opening this week
I am rather excited. I work 20 hrs a wk for a youth trust in Aranui. After 6yrs, they have finally got their community cafe off the ground. This week it is open. I thought it might be nice to add a splash of colour to the brand new leather couches..Cushions. From a mix of new fabric and some upcycled mens shirts...
So there you have it - so easy and quick - and no need to insert a fiddley zip - just use the buttons on the front as the opening. So why not freshen up your decor with a burst of summery fun - find some XL sized shirts and get sewing! :)
 |
| lots of colour with an aotearoa/pasifika feel |
 |
| man's shirt to cushion - and no need for a zip! yipeee!!! |
 |
| The green cushion has a white shirt backing complete with pocket! |
Subscribe to:
Posts (Atom)


