Showing posts with label kids. Show all posts

Tuesday, 28 April 2015

Pillowslip Frock Upcycled Tutorial - as featured in Hazed Magazine

Thought it was about time I posted the upcycled tutorials i have been writing for my column in the fantastic indie craft mag Hazed. So here is the first one (from the Spring 2013 edition).

Skill Level: Intermediate

Fancy making a frock?? Well then this tutorial is for you! First find two pillowslips that complement each other (look for good quality ones – retro/vintage are great!).


Choose one for the dress and one for the straps. I found mine at the local op-shop for 50 cents each.


Measure your pillowslip to get the required length, and add 3cm for hems. If your dress is long, you may need to unpick the folded envelope fabric on the inside of the pillowslip, to get it out of the way when you cut.


Now you can cut your pillowslip to the length required, allowing for a 1.5cm hem at both the top and bottom of the pillowslip. Carefully cut the folded end of the pillowslip open so you are left with a open ended ‘tube’ of fabric. Neaten the top and bottom edges with a zig-zag stitch. Fold each end over 1.5cm, press with an iron then stitch. Press each hem flat.


Now comes the fun part – shirring the bodice. Firstly you will need to hand wind an empty sewing bobbin with shirring elastic (available at sewing shops in haberdashery). Make sure you do not stretch the shirring elastic onto the bobbin, as this will produce uneven tension when sewing.


Place the bobbin in the machine and proceed to sew normally. I like to have the tension on about 4, but this will depend on your machine, so make sure you do some practice runs. When you start sewing the fabric will gather up, so just hold the fabric taught when you are sewing to make it easier.

Start sewing at a side seam and sew right around the fabric. When you get back to the start make sure you back tack a few times before stopping. Before you snip the thread and shirring elastic, pull about 2cms of shirring elastic out from the bobbin to stop it springing back inside the bobbin. Knot the ends of shirring elastic together and snip excess threads.


Repeat this process about 10 times, with each line about 1cm apart. If you have an older girl, do about 12 lines – younger can have about 8 lines to form the bodice.

Tip: - If you are unsure about shirring, practice on an old pillowslip first. Make lines of shirring, about 1cm apart, until you feel comfortable with how it works.

It’s now time for the straps – so take the other pillowslip and measure down from the folded edge about 8cm, and cut across the pillowslip. This will be the 2 front straps. Now repeat this step to make the back 2 straps.


Now fold your strap in half lengthwise so the right sides (with the pattern on them) are together, and neaten with both edges together, going from the top to the bottom. When you reach the bottom, head around the corner and across to the folded edge, so you have one closed end. Now follow the same path with a straight stitch, about ½ cm in from the edge of the fabric.

To turn the straps out, I use a turning tool (available at most sewing shops), but you can just carefully do it by hand if you have the patience!. Once your strap is turned out, you can iron it flat. Now you can neaten the open end together with a zig zag stitch.


Attaching the straps is simple. I like to place the straps about 8cm in from the side seams. You can pop the dress on your girl to find the best strap placement, as it does vary a bit depending on her age.Once you have attached the first front strap, use it as a guide to get the back strap in the same place, so it is even. Then do the same with the other 2 straps.

To attach, place the strap on with the open end just above the first shirring line. Then stitch a square around the edge of the strap.


This is the basic pillowslip dress finished. There are many embellishments you can add to this dress, such as doilies (I like to dye them for effect), buttons where the straps attach, or fabric yo-yo’s. You can even find a complimenting pillowslip with a frill around it. If you carefully unpick the frill, it can be used around the hem of the dress for added ‘girlie’ appeal. Taking your special girl with you to find pillowslips is great too, and if you go op-shopping it teaches her about reusing materials in a fun way.

Sunday, 10 November 2013

canvas creations

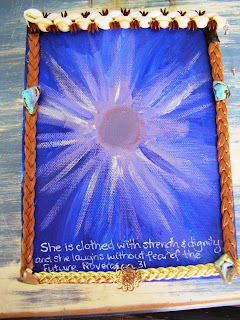
the kids and i dragged out the paints, dusted them off, and created up a storm.   Here is what we came up with:
this is my work in progress - mixed media with doilies
Tarn did this one, and decided he wanted to add a message
Gracie's flower with detail from my jewellery stash
Fun! my challenge was to not try and step in too much and just let the kids be creative how they wanted to...

Friday, 8 November 2013

10 years young!

and i'm not sure how we stayed sane packing in all that we have....but I wouldn't swap it for the world! So blessed to have 2 adorable tamariki and a wonderful husband to share life's ups and downs...
So we are off to the movies and out to dinner for Mexican to celebrate, whilst the kiddies are having a sleepover at Grannie and Grandads...
Never did like wearing white, so i went with bronze...
cows behaving themselves for this shot
And here are some of the pics from our gloriously happy day at Mt Hutt Retreat, just 10 short years ago...
ummm....what can i say?!?!?
Rakaia river bed with clouds gathering in the distance
some of our friends and whanau sending happy thoughts our way

A beautiful spot looking up to mt hutt for our ceremony
2 little forest faeries friends..
the start of our journey as Mrs and Mr!
 Awesome to look back 10yrs...Had so much fun creating my wedding dress and the forest faerie outfits.  A perfect, fun filled day - and now 10 crazy, adventurous, challenging, fufilling years on with 2 beautiful, amazing kids along for the ride....
a random pic of fireworks at the pier this week...

Friday, 9 August 2013

from pillowslip to frock

I made a rash decision recently and put my name forward to contribute to a very funky craft magazine - Hazed - created by the wonderful Hazel...After some past knock backs, i have to say i was a bit nervous about it all.  However there was no need......(Hazel is so lovely, and really encouraging!)

So ensued lots of fun finding a cute retro pillowslip from the local purple door opshop...and then a photoshoot - for one of my favourite redflax creations - my fern frocks...Basically a pillowslip dress for little girls.  I have had so much fun creating lots of these - op-shopping for retro and vintage pillowslips matching up buttons from my eclectic and now rather vast button collection, experimenting with dyeing embriodered pillowslips, adding frills on the hem from frilled pillowslips.....you get the idea...Now feels like a great time to share my frock fun with everyone!
Here are some sneak peaks from my photoshoot (coz i can't show all of it just yet!), with my gorgeous friend Dawn.  She has a fabulous eye for design, and happens to have a beautiful restored villa just up the road (which is great, as my little beachy batch is being earthquake repaired, and in rather a state at present!).
sharing a funny moment with my photographer!
Don't you just LOVE the retro iron!
Went perfectly with my retro pillowslip..
 So that is just a wee look at what I got up to - for the full tutorial, keep a look out for the Spring Edition of Hazed e-zine - EXCITING...
And here are some past redflax fern frocks I have had lots of fun creating:
My little G is in this collage - she was only 3 back then!
Loved the colours in this - and the covered buttons
this was the first one I sold - on felt.co.nz
 my cousins girl got this - she still wears  it 4 yrs later!
the orange fabric was an op
shopped waffle weave dressing gown 


Sunday, 28 July 2013

Hamner holiday

It was about time we had a bit of a break from New Brighton - as much as we love it here, the roadworks are edging ever closer to our house....so off we went.  Andy's lovely work gave him a holiday bonus, so we were even able to take the kids skiing.....Lots of fun!
the view from our road as we were leaving New Brighton
the view of the cute wee batch when we arrived in Hamner
family fun round the brazier toasting marshmallows
sparkler fun!
time to celebrate birthdays with a cake the kids decorated
my wee man is growing up!
gracie wanted to take the bunnies home!
isn't he adorable!
some of Paul's handiwork with a gas cutter on the brazier

Jack's Pass looking beautiful
T and G found a snow cave to play in...
It was just what we needed - so blessed to have such generous and loving whanau to holiday with!

Thursday, 20 June 2013

Tirohia atu nei ka wheturangitia Matariki, te whetu o te tau!

"Look above beyond the horizon and there you shall witness Pleiades, sign of the New Year Happy New Year!"

Wow - I can't quite believe Matariki is upon us again - the excitement of a new year, and the fun of trying to spot Matariki on the horizon - which is usually done sitting on our rooftop huddled under blankets...Although we are not quite brave enough to venture up to the rooftop tonight, for fear of being blown off!
It is also an excuse to get crafty with nga whetu (stars).  Gracie had lots of fun designing these stars to use as a Matariki table setting.


Matariki is slowly gaining attention in Aotearoa – nowhere else in the world has this unique celebration, so we need to embrace us, and celebrate our uniqueness as Pakeha and Maori living together in Aotearoa.

So tomorrow night’s celebrations will involve gathering with my sisters whanau, having hot soup and bread, decorating more stars, and tucking into a Matariki themed chocolate cake for dessert (which I have yet to create!)  So to you and yours this wintry new year - 

mihi o te Matariki, nga mihi o te Tau Hou

Happy Matariki, happy New Year…


Saturday, 13 April 2013

Princess club

25% of children in Aotearoa live in poverty.  A quarter of all NZ children - its just so wrong.  Our country has slipped further and further down the OECD list of countries for living conditions.

There are many organisations that work hard to address this problem, like the Sallies, City Mission, KidsCan school lunches, food banks, etc.  One place I found a few years ago that is attempting to address this issue in the eastern suburbs of Christchurch is Golden Harvest Trust.  Mel, (an amazingly hope filled woman) and a team of up to 100 volunteers run community clean ups, food parcels, and groups for kids.  The group that caught my attention is Princess Club.  Run for 4-12 yr old girls, they gather weekly and learn essential life skills, all with a Princess theme.  There is Princess Friendship, Princess Manners, Princess Trustworthy to name a few.  Once a month The Palace (a gorgeous space in the Hampshire Street Shops in Aranui) holds Ester's Pamper Palace.  The girls are treated to manicures, foot spas, hair wash and do ups, and they get to wear a gorgeous princess gown.

When I arrived there was one rack of dress ups.  Within a year 120 dresses were hanging on purpose built racks with 80 pairs of princess shoes and 60 tiaras.  A momentus year of design and creation, with lots of volunteers coming and going - assisting with shoe do ups, tiara making and stitching.

Here are some of the results:
black donated dress before
black donated dress after
close up detail to hide stitching
matching tiara to complete the look!

70's bridesmaid number 
refashioning underway!                  
a crazy nightie that the girls loved
crazy nightie becomes empire line gown
my 1st refashion - it was ripped and stained 
beaded detailing for extra princess appeal

$5 opshop taffeta gown
in the throws of a makeover -
lacing to be added


donated fabrics line my shelves
tiara making sessions in the school room

my lovely chaotic work space - rm 14, wainoni primary
a donated shoe rack with
donated shoes


the girls loved this, but too low cut!
solved that problem with insert of satin
snow white makeover

take 1 Pumpkin Patch dress
add some sparkle and bling...
and you have a gown fit for a princess!
butterfly tiara - so much fun to make!
So that's a bit of what i did for most of 2010.  Interrupted slightly by earthquakes, then 2yrs of study, but I am finally able to get back and volunteer some time with Princess Club, starting in May 2013...Yay!!!! :)