Showing posts with label vintage. Show all posts

Thursday, 30 July 2015

Meet Lady Luella Lovelace

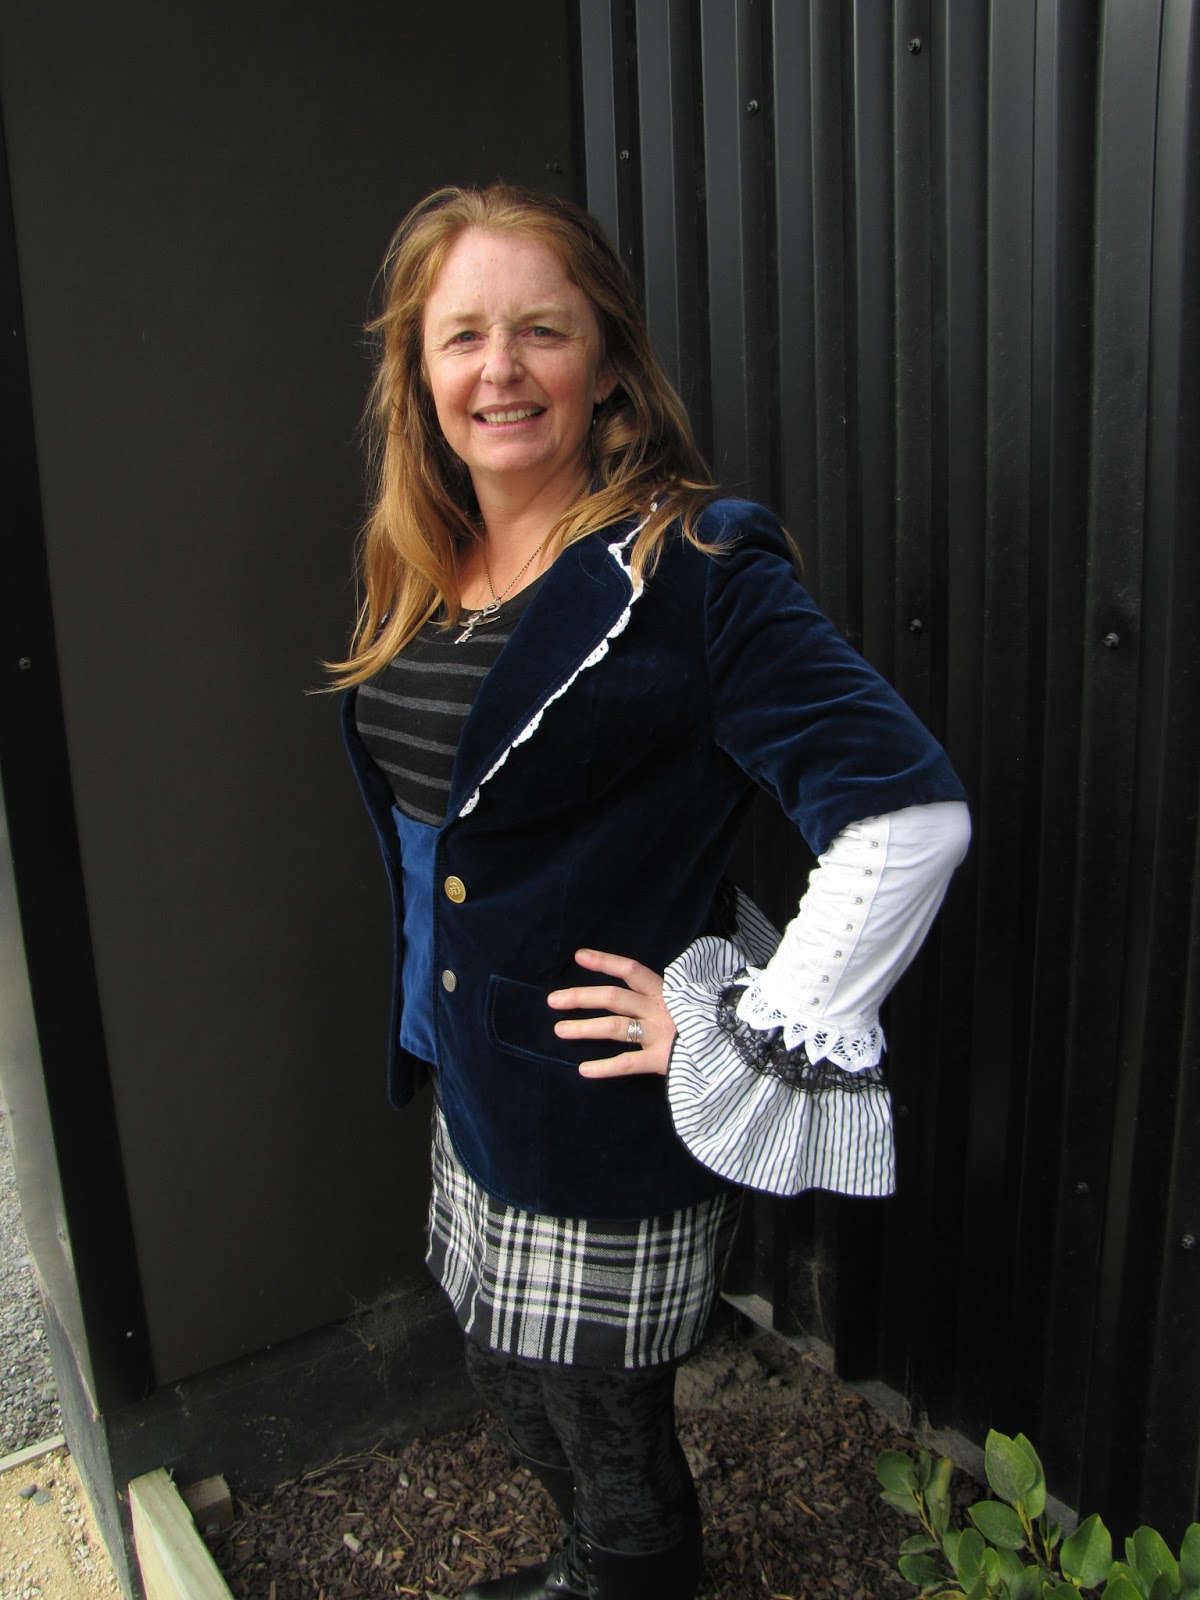
Inherit has struck again! This time with a vintage velvet NZ made jacket, a nz designer skirt and some lovely doilies to add a bit of lacyness.


I had initially paired up the velvet with the tartan school kilt, however it didn't quite look right. Then I discovered a gorgeous nz made skirt an the $3 op shop and added with a bit of lace, it looked perfect! The lacing came from another nz made $3 opshop shirt, with laced sleeve detailing. I have to say it was hard to let this one go - especially as it fitted me perfectly!


Thursday, 16 July 2015

In bed with a Hottie - Upcycled Tutorial featured in Hazed Magazine

Skill Level: Beginner/Intermediate (Just a bit more advanced than beginner level)

Just what you need to keep you snuggly on a cold winters night. And to keep you extra toasty why not try your hand at a hot water bottle cover? I have used a thrifted woolen blanket and sheet - however you can come up with your own eco-conscious cover using all sorts of upcycled garments - a woolen jersey, dressing gown or coat. Fabric to applique a design onto your cover can be nearly any type as you will fuse it with iron on fusing, giving it stability and strength. I have used a sheet for this one and neck ties for the hottie cover on the grey cover. Be creative, and feel free to send me pics of your creation, as I love to see what people come up with.

So what you will need to complete this project is:
Your chosen garments/linen/blanket
A hot water bottle for template
A sewing machine
Sewing thread
Sewing pins
Sewing scissors
Taylors Chalk or a light pencil
Ruler or tape measure
An iron and ironing board (or towel to iron on)
Paper or light card for a template and applique design
Sticky tape
Fusable interfacing/violene (make sure it has one side that has glue dots on it)
A button and loop of ribbon or cord for back closure

1. Firstly place your hottie onto paper/card and trace around. Now add 2cm around the entire template except the neck of the hottie. This part needs 3cm on each side to allow for the hottie to fit through the neck hole. This is your front template.

2. Now make a copy of your front template for the back. Measure ⅔ down this template and cut a straight line across. These 2 parts are the back template. You will now need to take the top part of your back template and cellotape 3cm on the bottom edge, so that your top back template ends up overlapping your bottom back template. This will provide the opening to slip the hottie into.


3. Label everything, pin the templates to your blanket and carefully cut around. You will now have 1 front piece and 2 back pieces.


4. Zig-zag stitch around all 3 templates to prevent fraying. You may find the material becomes wavy and slightly stretched. Just press it with your iron and it will return to its original shape.

5. Time to applique. Decide on a shape/symbol etc you like and draw or print this onto paper. Carefully cut around it (good idea to simplify it a bit if there are complicated areas, which is what I did with my NZ map).


9. Repeat steps 7 and 8 to make a small shape to applique onto the bottom back piece to hold the loop on.

10. Now pin the loop at the halfway point on the bottom piece near the top where the opening is.


11. Place your appliqued shape over the loop ends and zig-zag around it, securing the loop ends in place

12. Now place the top back piece over the bottom back piece and line it up until the back pieces are the same size as the front piece. Zig-zag these together along the sides to create the back opening.

13. Now you are ready to join it all together. Place the front piece on top of the back piece with the right sides facing each other.

14. Sew a straight stitch around the pieces 5mm in from the edges right around the pieces, starting at the top neck, and ending up back at the top neck.

15. Press the cover carefully before turning it in the right way. You may need to then press it again once it’s out the right way, to get the curves sitting nicely.

16. Lastly stitch a button near the bottom of the top back piece for the loop to go around to keep the hottie cover closed.

17. Now jump under the covers and snuggle your lovely eco-friendly hottie!


I made the grey one from an upcycled army blanket, to commemorate 100yrs since Gallipoli, and to pay tribute to those in NZ who lost their lives in the war.

Thursday, 4 June 2015

Oversew Fashion Awards Show 2015

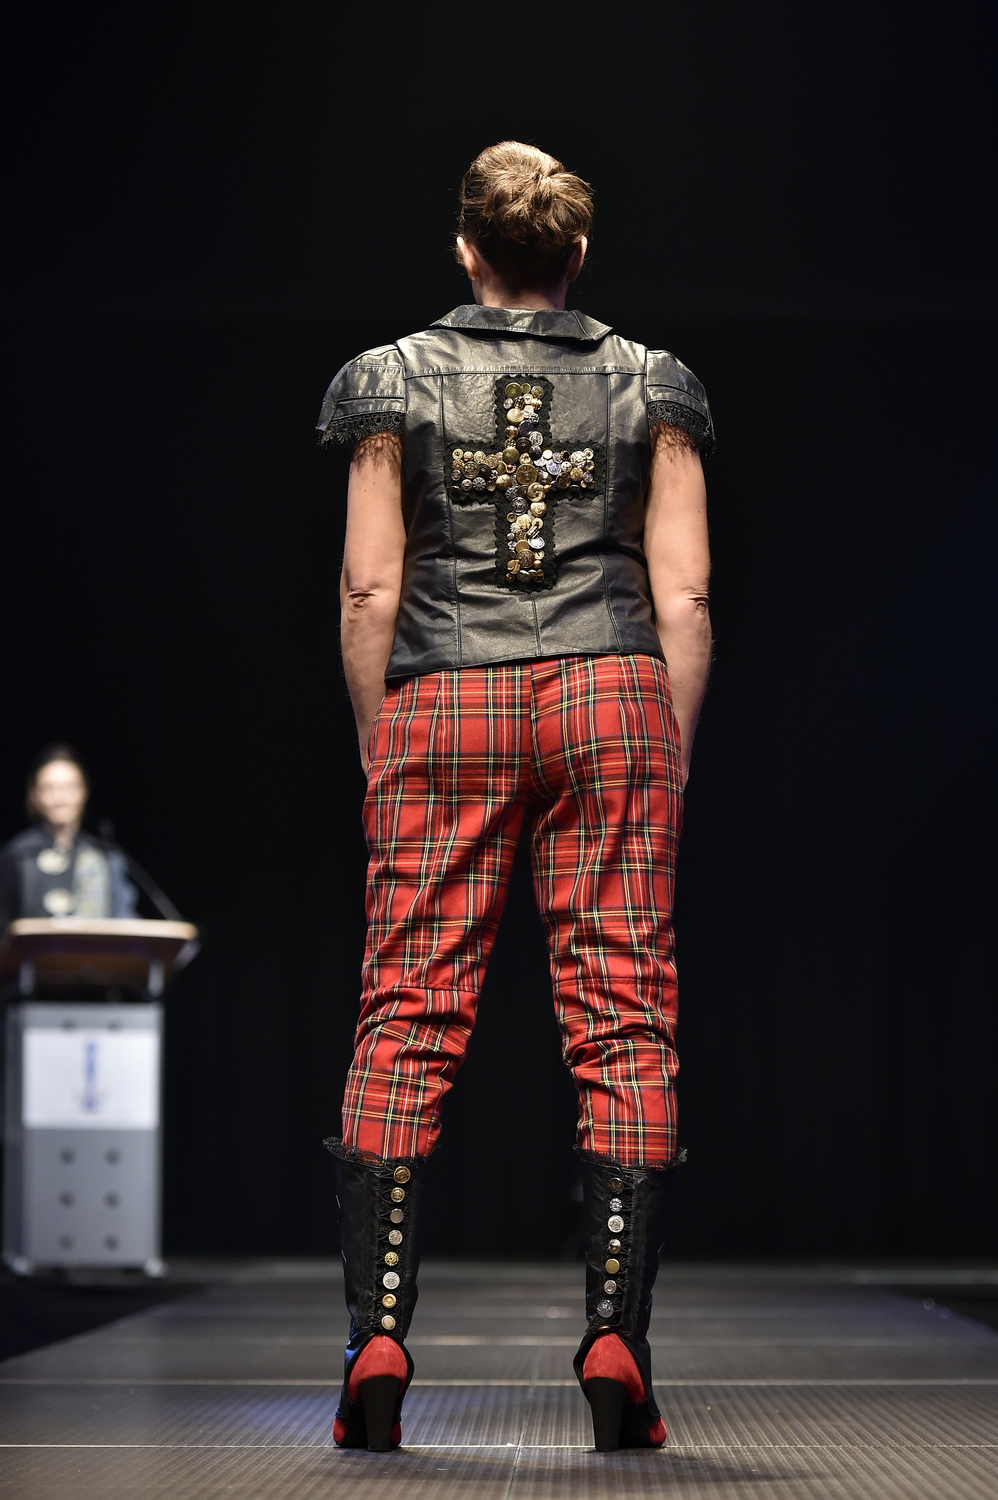
The long and the short of it is that i had my entry accepted - only 50 were accepted out of 120 submitted...so even though my design didn't quite meet the brief (in that it looked more like leather and tartan as opposed to leather and lace!) it made it down the runway. I was lucky enough thanks to the lovely Denise from NZ Eco fashion week to be given a ride to Carterton to watch the event. So much fun!!!! Met some awesome people too. One day i would love to put a mini collection into the NZ Eco Fashion Week. Also had a chance to mull over my dream to run a community wardrobe - like a creative space for people to learn and sell stuff and rent clothes for good occasions etc...

So anyway here is my favourite photo from the show - my model linda, a local accounts manager is very funky and rocked my outfit - she was the perfect choice!


A great experience! Next years theme is Fire and Ice...

Monday, 1 June 2015

With This Ring - Upcycled Tutorial Featured in Hazed Magazine


This sweet little ring bearer’s cushion can be made as a keepsake, by using treasured items from the bride and groom. Perhaps a favourite tie the groom was given by his grandfather, or a vintage button from the bride’s button stash handed down from her granny. Or even clothes from the couple’s wardrobe that are no longer worn. All can be repurposed and easily made into a cushion for wedding rings. You can also look for inspiration in local op shops – for colours or patterns that compliment the wedding. If the wedding party is getting outfits made you could ask for any leftover fabric/embellishments and construct a cushion that will coordinate perfectly. You are only limited by the theme of the wedding and your imagination.


If you are a beginner to the world of sewing, then stick to a simple square or circle cushion, with a button stitched on in the centre, and ribbon to attach the rings. You can use the instructions below, without adding the bunting.


Bunting Cushion
Skill level: heading towards intermediate level
Materials:
Sewing machine and matching threads
Sewing scissors
Fabric
Felt scraps
Ric-rac or narrow bias binding
Sewing needle
Sewing pins
Tailors chalk or a light pencil
Iron and ironing board
Circle template (eg a dinner plate or bowl)
Piece of card (eg cereal box or shoe box weight)

What to do:

Place your template on your fabric and draw 2 circles. Cut them out.


Now draw a triangle template on your card the size you want the bunting flags.

Place the template on the felt scraps, draw around and cut out, until you have enough flags.


Arrange the flags on the top circle into a curve. Make sure the bunting starts and finishes at least 1.5cm away from the edge of the circle, so you do not catch it when you sew the circles together.


Carefully pin the flags down and slowly sew along the top edge, stopping after each one to make sure the next one is in place.


Now sew your bias binding or ric rac over the top of the stitching line (don’t use ribbon as it doesn’t curve well).


Before attaching the top and bottom circles together, you can pin the buntings up and away from the stitching line if you are worried about catching them when you sew the seam.


Place the top and bottom circles together with the right sides facing each other. Sew with a straight stitch around the circle, 1cm from the edge. Remember to leave a 5 – 7cm opening to allow for stuffing.


Carefully clip around the circle every 1cm or so, to ensure you get a nicely curved circle.

Now stitch around the circle again, just inside the first straight stitch you did. This is to reinforce the seam so it doesn’t pull away at the clipped points. You can now trim the seam allowance from 1cm down to 5mm. If you want you can neaten the circle edges together with a zig zag stitch.

Image

Time to turn the cushion by pulling it through the stuffing hole. Once it’s out the right way give it a gentle press with the iron. If the circle is slightly straight in places you can turn it inside out and re-clip it, till the seam has an even curve.


Now stuff the cushion. I used wool filling from an old cot mattress (I washed it first), but you can also use Dacron (the filling used in pillows). Once you have the fullness you want, close up the opening. Fold the seam allowance under, and use a small hand stitch with needle and thread. Now work the stuffing around to fill out the cushion evenly.


Lastly you can stitch on a ribbon, twine or embroidery thread to attach the rings. Make sure this is securely fastened to the cushion with needle and thread, as you do not want the rings to come off.


Now the page boy is all set with a beautifully upcycled cushion, that compliments the wedding and can become a treasured keepsake of a special day. Here are some more examples that have been made from a mix of vintage linen and fabrics, doilies, upcycled clothing, and new fabric

Sunday, 17 May 2015

Inherit is underway

So my latest jacket is based on a fiesty female Pirate Captain who loves a bit of swashbuckling shennanagins! Introducing Captain Betsy Bonnie:


I had lots of fun creating this one - the skirt offered lots of fabric so i went for full sleeves and a pleat round the hem. Still lots left for another upcycle


I used the cotton tape around the hem to create the stripes on the lapel to give it a hint of militaryness. Now all she needs is a tricorn hat, plume and sword and she is ready to sail the seven seas.


This jacket is available to purchase at Clockwork Emporium, New Regent St, Christchurch. http://www.clockworkcafe.co.nz/

Thursday, 30 April 2015

BTW...

My outfit for oversew got accepted! Yay!!! So it will be in the show on 23rd May. Here is a wee preview: Happy with my work - I think next time i will try and work within the design brief, instead of designing something for me and making it fit into the brief. Feel confident enough to do this next year!

Monday, 10 March 2014

thinking outside the wardrobe door

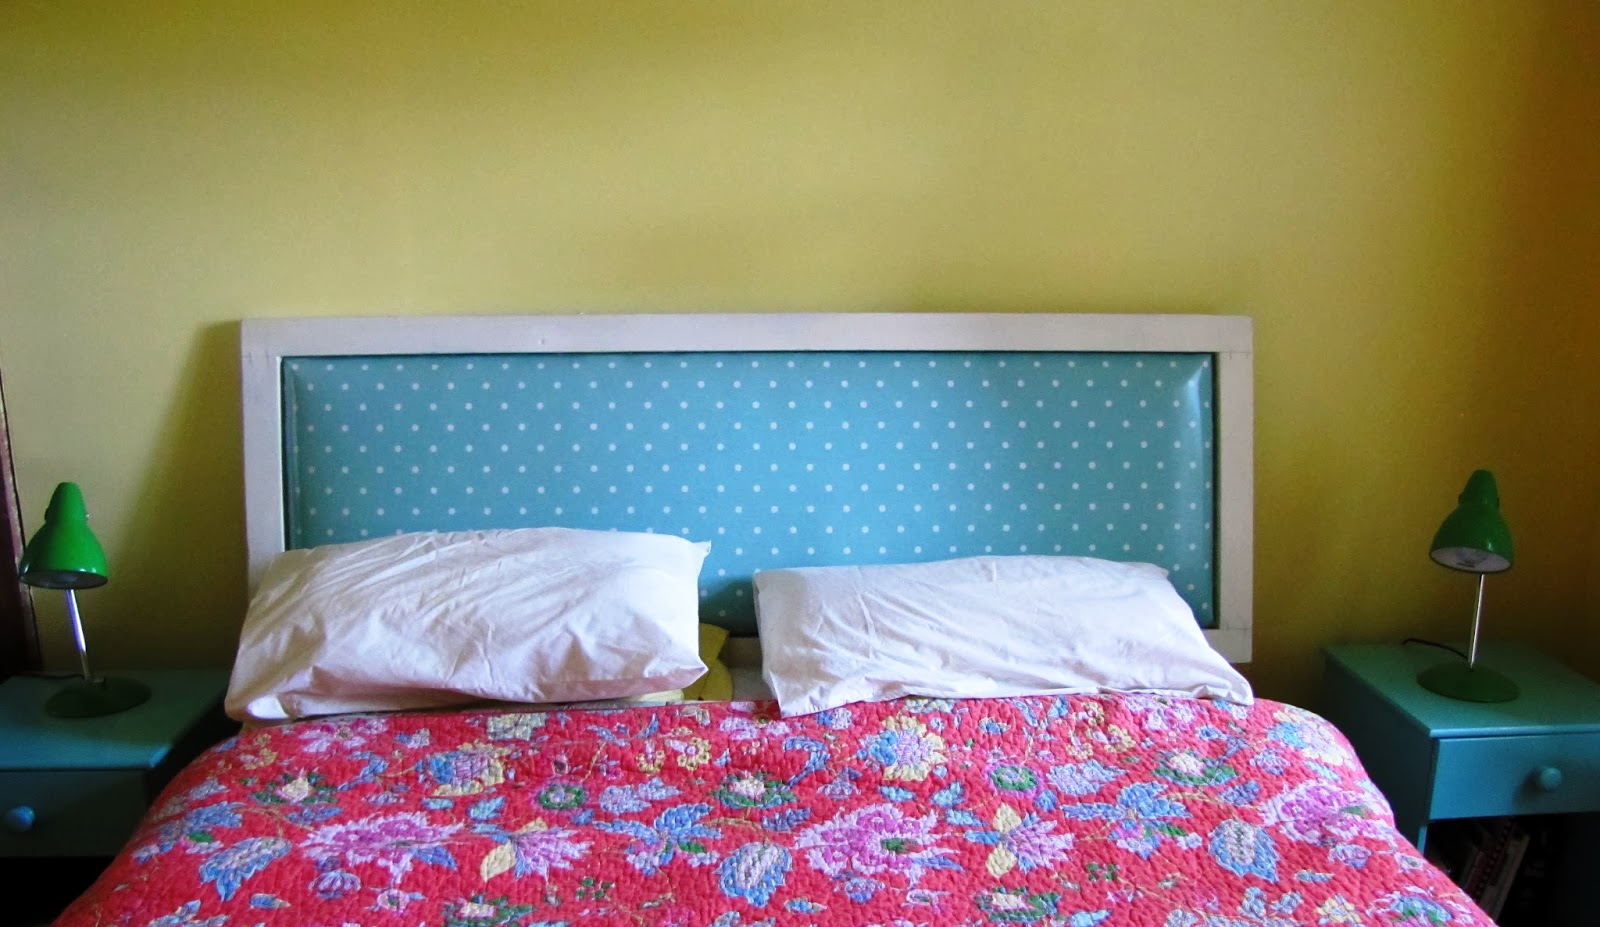
Renovating is underway alongside our earthquake repairs, and finally after 10 yrs our bedroom is being redecorated.  My ugly old wardrobe is now lying on our back lawn.  Hubby asked about a headboard, which got me thinking along the upcycling lines.  And that's where the wardrobe doors came into it.  Perfect size for a headboard - old rimu with lots of character.  Now to find some fabric - not just ordinary fabric - it had to deal with oily hubby hair and be washable.  Which led to oil cloth, and Femme de Broncante - OH what a LOVELY place.  Full of french provincial mixed with splashs of shabby chic...so inspiring!!!!
So i ended up with the seafoam polkadot oilcloth, and a pot of Annie Sloan old white chalk paint. ( which i will use to paint the dressers i got from trademe too)
The ugly old headboard lying next to my rimu wardrobe door
Firstly to sand down the wardrobe door, pull the nails out and take the backing off. Next I cut up an old foam bed topper to fit in the frame so the oilcloth is nicely padded. This gets glued to the backing board.While that is drying, time to paint the frame.  I started with Dulux D'Urville Island (my fav aqua paint) as the base, then applied old white chalk paint over the top and rubbed it back slightly for effect.  I then applied the Annie Sloan clear wax over the top to finish.
Now for the tricky bit - attaching the oil cloth to the frame with enough give in it to sit nicely over the padding, between the frame and the backing board.  I used a staple gun for this step.
Now to put it all together - I popped the painted 'frame' over the covered foam and squashed it down onto the backing board.  I used small nails and hammered them through from the back to secure the backing board to the frame.  All done!
My upcycled wardrobe door headboard.  Walls are in Resene Moonbeam
All that is left is to find some other bit of wardrobe framing to make legs to attach the headboard to the bed. (I also made some yummy linen curtains with fabric from Femme De Brocante - you can find their delicious shop here: http://www.fdb.co.nz/)  Will post a pic once the room is all finished...EXCITING!!!!


Monday, 2 September 2013

dream journal DIY

My first workshop with Youth Town went well today.   I am doing a mixed media journal workshop - so I thought i better do a practice run beforehand, and then thought I might share the fun!
You will need:

  • A hardcover journal (I got mine from the $2 discount shop)
  • Gel Medium (like Modge Podge, or Reeves Gel Medium)
  • Paint brushes
  • Fabric (non stretch and not pile fabric like velvet - fine cotton is best)
  • Embellishments (lace, ribbon, brads, buttons, charms...)
  • Ribbon (if you want a bookmark)
  • Needle and embriodery thread (if you are using more than one fabric)
  • Stamp + pad (if you want to add stamps)

Firstly, work out what fabric you are using and measure enough to cover the journal, with an inch spare all around to fold over.  Add any lace or embellishments before sticking the fabric to the journal.  Decorative split pins, ric rac, ribbon, and buttons are all great to use.  (Best not to stamp onto the fabric until after the first coat of gel medium is applied.
Got my supplies all ready - dug into my fabric stash and
found these lovely vintage cottons...
Stitching up the fabric with embriodery thread
fabric is now ready to stick to the cover
Once you are happy with how your fabric looks, paint a generous amount of gel medium onto the journal (paint the back first, stick down the fabric, then do the spine, then repeat on the front cover).  Make sure you place some wax paper between the covers and pages to stop the medium sticking to the journal pages.  Now place your fabric onto the journal and smooth it out, getting rid of any air bubbles.  Make sure it is straight and even.
Applying gel medium to the fabric cover
Now apply a layer of gel medium over the top of the fabric cover.  If you have any lace, ric rac or other raised embellishments, make sure you put a generous amount of gel medium over these to help them stick down and create a seal.  Sit the book up on top of a plastic bag and let dry.
folding the flaps over and sticking them down with gel medium
 Once the cover is touch dry, you can trim the corners off the fabric and fold the flaps over to the inside of the journal.  Stick the flaps down with some gel medium, then paint more over the top to secure them.
drying the finished journal on some wax paper,
(the red ribbon i attached at the top for a bookmark)
 Stand the journal up to dry completely - this will probably take overnight, and will  become clear and shiny.  If you want to do any stamping, this can be applied when the first coat is touch dry.  To seal stamps, add another coat of gel medium.
This is Gracies finished journal cover, showing a stamp she
chose.  The second coat of gel medium is drying

Gracie chose to add silver stickers to the corners of her jounal, and used heart shaped brads under the ric rac.  The inside covers of the journal look a bit rough - so you can cut some coloured craft card to compliment your journal cover and stick it to the inside covers to cover up any raw edges.  And that's it.  easy ay! Time to start journalling your hopes and dreams...

ps - here are some of the journals from my workshop: