Showing posts with label doilies. Show all posts

Thursday, 30 July 2015

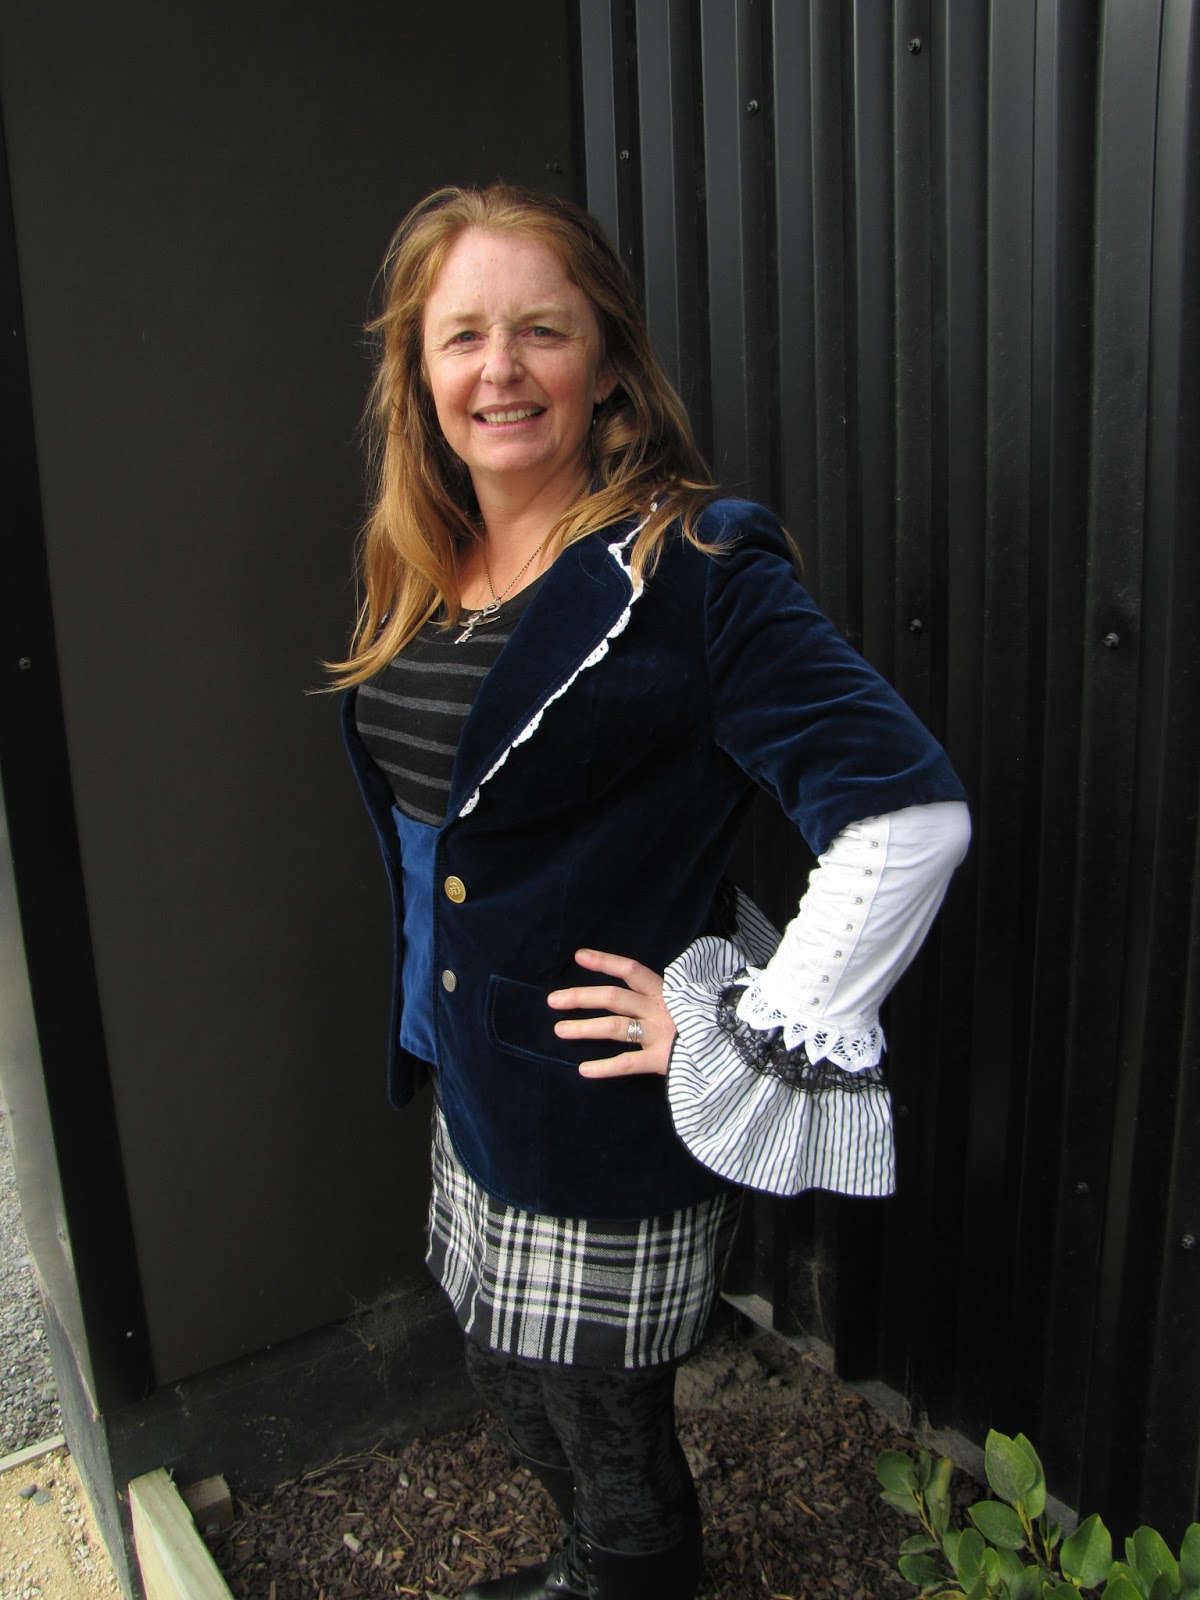
Meet Lady Luella Lovelace

Inherit has struck again! This time with a vintage velvet NZ made jacket, a nz designer skirt and some lovely doilies to add a bit of lacyness.


I had initially paired up the velvet with the tartan school kilt, however it didn't quite look right. Then I discovered a gorgeous nz made skirt an the $3 op shop and added with a bit of lace, it looked perfect! The lacing came from another nz made $3 opshop shirt, with laced sleeve detailing. I have to say it was hard to let this one go - especially as it fitted me perfectly!


Monday, 1 June 2015

With This Ring - Upcycled Tutorial Featured in Hazed Magazine


This sweet little ring bearer’s cushion can be made as a keepsake, by using treasured items from the bride and groom. Perhaps a favourite tie the groom was given by his grandfather, or a vintage button from the bride’s button stash handed down from her granny. Or even clothes from the couple’s wardrobe that are no longer worn. All can be repurposed and easily made into a cushion for wedding rings. You can also look for inspiration in local op shops – for colours or patterns that compliment the wedding. If the wedding party is getting outfits made you could ask for any leftover fabric/embellishments and construct a cushion that will coordinate perfectly. You are only limited by the theme of the wedding and your imagination.


If you are a beginner to the world of sewing, then stick to a simple square or circle cushion, with a button stitched on in the centre, and ribbon to attach the rings. You can use the instructions below, without adding the bunting.


Bunting Cushion
Skill level: heading towards intermediate level
Materials:
Sewing machine and matching threads
Sewing scissors
Fabric
Felt scraps
Ric-rac or narrow bias binding
Sewing needle
Sewing pins
Tailors chalk or a light pencil
Iron and ironing board
Circle template (eg a dinner plate or bowl)
Piece of card (eg cereal box or shoe box weight)

What to do:

Place your template on your fabric and draw 2 circles. Cut them out.


Now draw a triangle template on your card the size you want the bunting flags.

Place the template on the felt scraps, draw around and cut out, until you have enough flags.


Arrange the flags on the top circle into a curve. Make sure the bunting starts and finishes at least 1.5cm away from the edge of the circle, so you do not catch it when you sew the circles together.


Carefully pin the flags down and slowly sew along the top edge, stopping after each one to make sure the next one is in place.


Now sew your bias binding or ric rac over the top of the stitching line (don’t use ribbon as it doesn’t curve well).


Before attaching the top and bottom circles together, you can pin the buntings up and away from the stitching line if you are worried about catching them when you sew the seam.


Place the top and bottom circles together with the right sides facing each other. Sew with a straight stitch around the circle, 1cm from the edge. Remember to leave a 5 – 7cm opening to allow for stuffing.


Carefully clip around the circle every 1cm or so, to ensure you get a nicely curved circle.

Now stitch around the circle again, just inside the first straight stitch you did. This is to reinforce the seam so it doesn’t pull away at the clipped points. You can now trim the seam allowance from 1cm down to 5mm. If you want you can neaten the circle edges together with a zig zag stitch.

Image

Time to turn the cushion by pulling it through the stuffing hole. Once it’s out the right way give it a gentle press with the iron. If the circle is slightly straight in places you can turn it inside out and re-clip it, till the seam has an even curve.


Now stuff the cushion. I used wool filling from an old cot mattress (I washed it first), but you can also use Dacron (the filling used in pillows). Once you have the fullness you want, close up the opening. Fold the seam allowance under, and use a small hand stitch with needle and thread. Now work the stuffing around to fill out the cushion evenly.


Lastly you can stitch on a ribbon, twine or embroidery thread to attach the rings. Make sure this is securely fastened to the cushion with needle and thread, as you do not want the rings to come off.


Now the page boy is all set with a beautifully upcycled cushion, that compliments the wedding and can become a treasured keepsake of a special day. Here are some more examples that have been made from a mix of vintage linen and fabrics, doilies, upcycled clothing, and new fabric

Sunday, 1 June 2014

Hazed Magazine

have you checked out the treasure hunt that has just started over at Hazel loves design? Its pretty awesome - up to $1500 worth of handmade loveliness, including one of my custom designed ring bearer cushions, for your big day (or someone you know who is getting married)
My up cycled ring bearers cushion featuring beautiful rings
by Julia @ Relique

a photoshoot at my mum's gorgeous villa
So, if you want to take part, follow this link to Hazel Loves Design, and get hunting!

http://www.hazellovesdesign.com/2014/05/were-going-on-treasure-hunt.html

:) J

ps - my tutorial will be featured on the blog too, if you are interested in making one of these lovely cushions!


Sunday, 10 November 2013

canvas creations

the kids and i dragged out the paints, dusted them off, and created up a storm.   Here is what we came up with:
this is my work in progress - mixed media with doilies
Tarn did this one, and decided he wanted to add a message
Gracie's flower with detail from my jewellery stash
Fun! my challenge was to not try and step in too much and just let the kids be creative how they wanted to...

Friday, 9 August 2013

from pillowslip to frock

I made a rash decision recently and put my name forward to contribute to a very funky craft magazine - Hazed - created by the wonderful Hazel...After some past knock backs, i have to say i was a bit nervous about it all.  However there was no need......(Hazel is so lovely, and really encouraging!)

So ensued lots of fun finding a cute retro pillowslip from the local purple door opshop...and then a photoshoot - for one of my favourite redflax creations - my fern frocks...Basically a pillowslip dress for little girls.  I have had so much fun creating lots of these - op-shopping for retro and vintage pillowslips matching up buttons from my eclectic and now rather vast button collection, experimenting with dyeing embriodered pillowslips, adding frills on the hem from frilled pillowslips.....you get the idea...Now feels like a great time to share my frock fun with everyone!
Here are some sneak peaks from my photoshoot (coz i can't show all of it just yet!), with my gorgeous friend Dawn.  She has a fabulous eye for design, and happens to have a beautiful restored villa just up the road (which is great, as my little beachy batch is being earthquake repaired, and in rather a state at present!).
sharing a funny moment with my photographer!
Don't you just LOVE the retro iron!
Went perfectly with my retro pillowslip..
 So that is just a wee look at what I got up to - for the full tutorial, keep a look out for the Spring Edition of Hazed e-zine - EXCITING...
And here are some past redflax fern frocks I have had lots of fun creating:
My little G is in this collage - she was only 3 back then!
Loved the colours in this - and the covered buttons
this was the first one I sold - on felt.co.nz
 my cousins girl got this - she still wears  it 4 yrs later!
the orange fabric was an op
shopped waffle weave dressing gown 


Monday, 25 March 2013

a treasure trove

I found one today - the city mission op shop (or thrift shop/charity shop) in town, has a room to the side - and in that room is a little shelf.  On the little shelf, I found  sewing treasures.  See:
I was soooooo excited - but slightly nervous about how much i had racked up.  So I tentively popped everything on the counter, and to my utter surprise was charged $5 for all of it.  The gorgeous vintage patterns, zips, bias binding, metro threads, snap domes, bobbin case, embroidered linens, buttons, and my favourite find - the bias binding maker.  That is the metal thing in the foreground of the photo, lying on a hand written note.  Some lovely old dear has written instructions for DIY bias binding.  SOOOO excited - now i can easily make my own - handy for buntings, and edging bibs for baby gifts....
The patterns will join the 300+ i have stashed in my cupboard - (thats one of my slightly addictive habits!)

Thats my excitment for the day - in fact it will keep me excited for at least the next week! :)

Thursday, 21 February 2013

sorting the sewing room

so the sorting of the sewing room has begun.  Its rather slow and arduous - the first to find the recycling bin was a whole lot of textile notes.  I don't fancy textile technology overly.  Next came lots of PAD and Illustrator notes - my least favourite subjects at Fashion School.  After filing all the design and patternmaking notes, i started on the fabric.

And, not surprisingly, inspiration began seeping out of the fabrics.  Aprons were being formed in my design mind, and here is a pic of one of them underway  (I took the photo on a strategic angle to avoid the crazy mess that still inhabits most of my sewing room). The frill at the bottom is from a frilled pillow slip - I might just put some along the top of the bib, for a bit of extra frilly shabby chic!

Next on the sort pile are my doileys - this is where it gets a bit scary - I have MASSES of them - too scared to count them - might have to admit i have an addiction!  So out of that sorting came a cushion cover, to cover my rather tired cushions and freshen up the colour scheme in our lounge.  I used a dyed pillow slip, a dyed napkin and a doiley for this one.  Loving the colourway!  The back is envelope style to avoid a zipper, and has some lovely machine embriodery on it, with a scalloped edge...
so the sorting has commenced.  I am excited to see what else comes out of it :) J